orbit timer instruction manual
Orbit Timer Instruction Manual: A Comprehensive Guide
Welcome! This manual provides detailed guidance for setting up and utilizing your Orbit timer, ensuring efficient lawn hydration.
From initial setup to advanced features,
we’ll cover everything, referencing user manuals and online resources for optimal performance.
Understanding programming steps, like setting run times and utilizing rain delay, is crucial for successful operation.
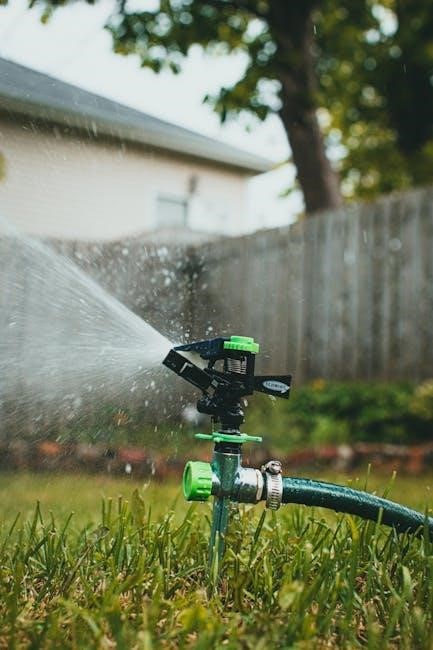
Orbit timers represent a popular and accessible solution for automating residential and light commercial irrigation systems. These devices offer a convenient way to manage watering schedules, promoting water conservation and healthy landscapes. From basic mechanical timers to sophisticated digital models, Orbit provides a range of options to suit diverse needs and budgets.
The core function of an Orbit timer is to control the flow of water to your sprinkler zones based on pre-programmed settings. This eliminates the need for manual operation, ensuring consistent and reliable watering, even when you’re away. Many users, especially beginners, find step-by-step video guides (like those on YouTube) invaluable for understanding the initial setup and programming process.
Modern Orbit timers often include features like rain delay, seasonal adjust, and manual override, enhancing flexibility and responsiveness to changing weather conditions. Understanding these features, as highlighted in various user manuals, is key to maximizing the benefits of your timer and optimizing water usage. Proper programming, as emphasized in Reddit discussions, is vital for avoiding common issues.
Understanding Different Orbit Timer Models
Orbit offers a diverse lineup of sprinkler timers, catering to varying levels of complexity and user preference. Basic mechanical timers are straightforward, relying on dials and simple settings for operation. Digital timers, like the 57894-27896 model, provide greater precision and programming capabilities, including individual zone control and multiple start times.
More advanced models incorporate smart technology, enabling remote control via smartphone apps and integration with weather data for automated adjustments. These “smart” timers often learn watering patterns and optimize schedules based on local conditions. The choice of model depends on factors like the size of your yard, the number of sprinkler zones, and your desired level of control.
It’s crucial to consult the specific user manual for your Orbit timer model, as features and programming procedures can differ significantly. Online resources and video tutorials can also be helpful in understanding the unique functionalities of each timer. Knowing your model’s capabilities ensures efficient and effective irrigation management.
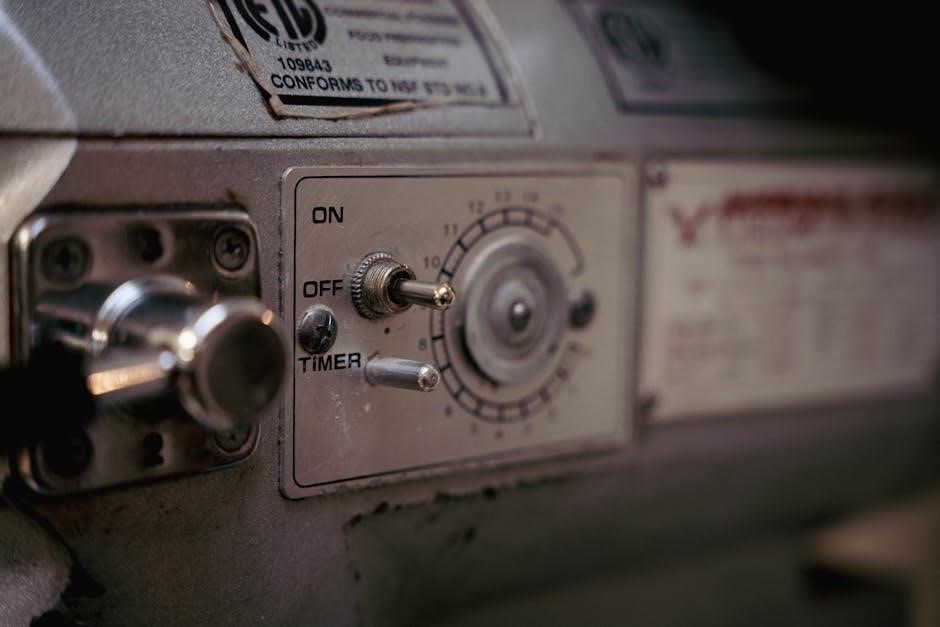
Key Components of an Orbit Timer
Orbit timers, regardless of model, share several core components. The digital display shows the current time, date, and programmed settings. A control dial (or buttons on digital models) allows navigation through menus and adjustment of parameters. Program buttons are dedicated to setting watering schedules, run times, and days of operation.
Zone buttons control individual sprinkler zones, enabling customized watering for different areas of your yard. A manual override function allows immediate activation of sprinklers, bypassing the programmed schedule. The battery compartment houses the power source, typically AA batteries.
More advanced models may include a rain sensor connection port and a master valve control terminal. Understanding the function of each component is vital for successful programming and troubleshooting. Refer to your specific model’s diagram in the user manual for precise component locations and descriptions.

Setting Up Your Orbit Timer
Initial setup is key! Begin by installing batteries and mounting the timer. Then, accurately set the current time and date before programming your desired watering schedules for optimal results.
Initial Setup and Battery Installation
Getting started is simple! Before programming, ensure your Orbit timer is properly prepared. Begin by locating the battery compartment, typically on the timer’s front or side. Open the compartment and insert the required batteries – usually AA or AAA, depending on your model.
Important: Observe the correct polarity (+ and -) as indicated inside the compartment. Incorrect installation can prevent the timer from functioning. Once batteries are in place, securely close the compartment. Next, mount the timer in a sheltered location, protecting it from direct rain and extreme temperatures.
Consider proximity to an electrical outlet if your model requires power, or ensure easy access for battery changes. Finally, briefly review the timer’s display to confirm it powers on, indicating successful battery installation and readiness for time and schedule setup. A functional display is the first step towards automated watering!
Setting the Current Time and Date
Accurate timekeeping is essential for precise watering schedules. To set the current time on your Orbit timer, locate the “SET CLOCK” position on the dial and turn to it. Use the arrow (∧ and ∨) or (+) and (-) buttons to adjust the hour and minutes. Holding these buttons accelerates the adjustment process.
Confirm accuracy! Ensure you’ve selected AM or PM correctly. Some models also allow date setting. If so, navigate to the date setting function (consult your specific model’s manual) and use the same arrow buttons to set the month, day, and year.
Once the time and date are correct, press the “ENTER” or “SET” button to save your changes. The timer will then return to the normal display, showing the current time. Double-check the display to confirm the settings before proceeding to program your watering schedules. A correctly set time ensures your lawn receives water when you intend.
Programming Watering Schedules ⏤ Basic Overview
Orbit timers simplify lawn care through programmable watering schedules. The core process involves defining when and how long each zone receives water. Begin by understanding the timer’s interface – typically involving a dial to select programming modes and buttons to adjust settings.
Key elements include: selecting watering days (e.g., Monday, Wednesday, Friday), setting a start time for watering, and determining the run time (duration) for each individual zone. It’s highly recommended to write down your desired schedule before programming the timer, minimizing errors.
Most Orbit timers allow multiple independent programs, enabling customized schedules for different areas of your yard. Remember to check your timer’s manual for specific instructions, as interfaces vary between models. A well-planned schedule conserves water and promotes a healthy lawn.

Programming Watering Schedules ⏤ Detailed Steps
Let’s dive deeper! Detailed programming involves navigating the timer’s menu to precisely set watering days, start times, and run durations for each zone, ensuring optimal hydration.
Selecting Watering Days
Choosing the right days is key! To select watering days on your Orbit timer, typically you’ll navigate to a “Watering Days” or similar setting within the programming menu. Many models allow for individual day selection – Monday, Tuesday, Wednesday, and so on – enabling customized schedules.
Some timers offer pre-set options like “Every Other Day” or “Weekdays Only” for convenience. Remember to write down your desired schedule before programming, as suggested by a Reddit user in r/Irrigation, to avoid errors. Carefully check off each step as you program to confirm accuracy.
Consider local watering restrictions and your lawn’s specific needs when choosing days. Avoid watering during peak evaporation times, and ensure adequate soil moisture. Refer to your specific Orbit timer model’s manual for precise instructions, as the interface can vary.
Setting Start Times
Precise timing is essential! After selecting watering days, you’ll set the start time for each programmed schedule. Typically, this involves navigating to a “Start Time” setting on your Orbit timer. Use the arrow or +/- buttons to adjust the hour and minutes.
As highlighted in Orbit’s user manual logic, turning the dial to the “SET CLOCK” position is often the first step, ensuring accurate timekeeping before setting start times. Consider watering during cooler hours – early morning is often best – to minimize water loss due to evaporation.
Remember to double-check your start times to avoid conflicts or unintended watering. A YouTube tutorial emphasizes understanding the timer’s functions for effective programming. Confirm each step as you program, mirroring the advice from r/Irrigation, to guarantee your desired schedule is correctly implemented.
Adjusting Run Times for Each Zone
Tailor watering to your landscape! Each zone in your sprinkler system likely requires a different watering duration. To adjust these times on an Orbit timer, navigate to the “RUN TIME” position, as detailed in the Orbit 57894-27896 Timer User Manual.
The display will typically show the current zone number and its assigned run time. Utilize the arrow buttons to increase or decrease the duration, measured in minutes. Consider the plant types and soil conditions within each zone – grass needs less time than flowerbeds, for example.
Remember to write down your desired run times before programming, a tip from r/Irrigation, to minimize errors. Regularly review and adjust these times based on seasonal changes and rainfall. Accurate zone run times are key to efficient water usage and a healthy lawn.
Using the Manual Watering Function
Need immediate irrigation? The manual watering function allows you to bypass the programmed schedule and activate sprinklers on demand. This is useful for spot-watering or addressing unexpected dryness. Consult your specific Orbit timer model’s documentation, as activation methods vary.
Typically, you’ll find a “Manual” or “Test” button or position on the dial. Engaging this function will often initiate watering for a pre-set duration, or allow you to specify a custom run time. Remember to disengage the manual function once finished to revert to the programmed schedule.

This feature is also helpful for testing your zones after initial setup or repairs, ensuring each sprinkler head is functioning correctly. Always monitor the watering process during manual operation to prevent overwatering or runoff.

Advanced Features and Settings
Unlock full control! Explore features like rain delay, seasonal adjust, and master valve control to optimize water usage and customize your Orbit timer’s performance.
Rain Delay Function – How to Use It
Conserve water with the Rain Delay function! This feature temporarily suspends your programmed watering schedule, preventing unnecessary irrigation during rainfall. To activate, navigate to the “Rain Delay” setting on your Orbit timer – the exact method varies by model, so consult your specific manual.
Typically, you’ll be prompted to enter the duration of the delay, often in days. Some timers allow for automatic rain delay using data from local weather stations, though this requires a Wi-Fi connected model.
Once set, the timer will pause all scheduled watering until the delay period expires. Remember to deactivate the rain delay once the weather clears to resume normal operation. Utilizing this feature is a simple yet effective way to promote water conservation and maintain a healthy lawn.
Seasonal Adjust – Optimizing Water Usage
Maximize water efficiency with Seasonal Adjust! As weather patterns change, your lawn’s watering needs evolve. The Seasonal Adjust feature allows you to globally increase or decrease watering run times across all zones, adapting to varying temperatures and rainfall.
This is particularly useful during hotter summer months when increased evaporation demands longer run times, or cooler, wetter seasons when less water is required. Typically, you’ll set a percentage adjustment – for example, increasing run times by 25% during peak summer.
Regularly adjusting your schedule based on the season prevents overwatering and promotes a healthy, thriving lawn while conserving precious water resources. Consult your Orbit timer’s manual for specific instructions on accessing and utilizing this valuable feature.
Master Valve Control – Understanding and Setup

Enhance system safety with Master Valve Control! This feature allows connection to a master valve, typically installed on the main water supply line. The Orbit timer can then control the entire irrigation system’s water flow with a single signal.
This is crucial for safety, allowing immediate shut-off in case of leaks or emergencies, preventing potential water damage. Setup involves connecting a wire from the timer’s designated master valve terminal to the valve’s solenoid.
Ensure proper wiring according to your timer model’s instructions. Activation is usually programmed within the timer’s settings, enabling or disabling the master valve control. Always test the system after setup to confirm proper functionality and emergency shut-off capabilities.

Troubleshooting Common Issues
Facing problems? This section addresses frequent issues like incorrect time displays, sprinkler malfunctions, and zone duration discrepancies.
We’ll guide you through solutions, including error message decoding and programming checks.
Timer Not Displaying Correct Time
Issue: Your Orbit timer shows an inaccurate time, potentially disrupting your watering schedule. This is a common problem, often easily resolved.
Troubleshooting Steps: First, turn the dial to the SET CLOCK position. As indicated in Orbit’s user manual logic, use the and ⏤ buttons to adjust the current time of day. Remember, holding down these buttons accelerates the time adjustment.
Possible Causes: Low batteries can cause time resets or display errors. Ensure fresh batteries are installed. Power outages, even brief ones, can also reset the timer. If the issue persists, double-check the AM/PM setting. Incorrect initial setup is another potential culprit; review the initial setup instructions to confirm proper configuration.
Further Assistance: If the time continues to be incorrect after these steps, consult the full Orbit Sprinkler Timer User Manual or search online forums like Reddit’s r/Irrigation for community solutions.
Sprinklers Not Activating
Problem: Your Orbit timer is programmed, but the sprinklers aren’t turning on. This can stem from several issues, requiring systematic troubleshooting.
Initial Checks: Verify the timer isn’t in “Manual” mode, overriding the programmed schedule. Confirm the program is enabled and the current date/time are correctly set. Check for any error messages displayed on the timer screen, as these provide valuable clues.
Wiring & Valve Issues: Inspect the wiring connections between the timer and the sprinkler valves. Loose or corroded connections can prevent activation. Ensure the zone valves themselves are functioning correctly – manually test them if possible. A faulty valve solenoid is a common cause.

Power Supply: Confirm the timer has adequate power (fresh batteries or a functioning power adapter). Reddit users often point to programming errors as a primary cause, so double-check your schedule!
Zone Not Running for the Programmed Duration
Issue: A specific sprinkler zone stops watering before the set run time expires. This indicates a problem either with the timer’s programming for that zone or with the zone’s components.
Timer Verification: Double-check the “Run Time” setting for the affected zone within the Orbit timer’s programming. Ensure you’ve correctly entered the desired duration. Use the arrow buttons to confirm the setting. Remember to write down your desired schedule before programming!
Valve & Pressure: Inspect the zone valve for any obstructions or damage. Low water pressure can also cause premature shut-off. Check for leaks in the zone’s piping, which could reduce pressure.
Wiring & Signal: Examine the wiring connecting the timer to the zone valve. A weak signal or intermittent connection might interrupt the watering cycle. Consider a faulty solenoid within the valve itself.
Dealing with Error Messages
Error Indication: Your Orbit timer may display error messages indicating a system malfunction. These messages are crucial for diagnosing the problem. Consult your specific model’s manual for a complete list and explanation of each code.
Common Errors & Solutions: A “Low Battery” message requires immediate battery replacement. “Signal Interference” suggests a wiring issue or proximity to other electronic devices. “Valve Fault” points to a problem with a zone valve, potentially needing repair or replacement.
Resetting the Timer: If an error persists, try resetting the timer to factory defaults (refer to the manual for instructions). This can clear temporary glitches. However, you’ll need to reprogram all settings afterward.
Contact Support: For unresolved errors, contact Orbit’s customer support with the error code and timer model number. They can provide specific troubleshooting guidance.

Maintenance and Care
Protect your investment! Regularly clean the timer’s exterior. Winterize your system to prevent freezing damage, and replace batteries annually for consistent, reliable operation.
Cleaning Your Orbit Timer
Maintaining a clean timer is essential for longevity and accurate operation. Dust, dirt, and debris can interfere with button functionality and potentially damage internal components. To clean your Orbit timer, always disconnect it from the power source – either by removing the batteries or unplugging the transformer.
Use a soft, damp cloth to gently wipe down the exterior casing. Avoid harsh chemicals, abrasive cleaners, or excessive water, as these can damage the plastic and electronic parts. For stubborn dirt, a mild soap solution can be used, but ensure the timer is thoroughly dried afterward.
Pay particular attention to the display screen and button areas. A small, soft brush (like a toothbrush) can help remove debris from around the buttons. Never submerge the timer in water or spray liquids directly into the unit. Regular cleaning, performed every few months, will help keep your Orbit timer functioning optimally for years to come.
Winterizing Your Sprinkler System and Timer
Protecting your sprinkler system and Orbit timer from freezing temperatures is crucial to prevent damage. Before the first frost, begin by shutting off the water supply to your sprinkler system, typically located at the main valve. Then, it’s vital to blow out the lines using compressed air to remove any remaining water that could freeze and cause pipes to burst.
Remove the Orbit timer from its mounting location. Take out the batteries to prevent corrosion from potential leaks or temperature fluctuations. Store the timer in a dry, sheltered indoor location, away from extreme cold or humidity.
If your timer has a manual override function, ensure it’s switched off. Properly winterizing your system and timer will ensure a smooth start-up when warmer weather returns, saving you costly repairs and extending the lifespan of your irrigation components.
Replacing Batteries
Maintaining fresh batteries is essential for reliable operation of your Orbit timer. A low battery can lead to inaccurate timekeeping or programming errors, disrupting your watering schedule. Most Orbit timers utilize standard alkaline batteries – check your specific model’s documentation for the correct type and quantity.
To replace the batteries, carefully open the battery compartment, usually located on the timer’s face or back. Remove the old batteries and install new ones, ensuring correct polarity (+ and -) as indicated inside the compartment.
After replacing the batteries, it’s crucial to reset the time and date on your timer. Some models may briefly display a low battery indicator before requiring a reset. Regularly check the battery level, especially during peak watering seasons, to avoid unexpected interruptions to your irrigation system.